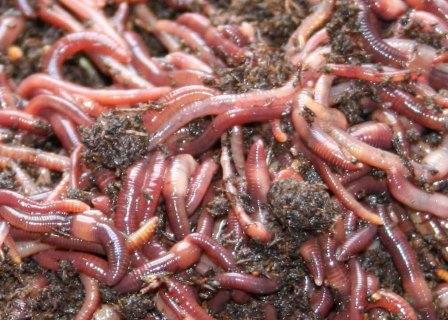
WORM INSTRUCTIONS, TIPS AND CARE INFORMATION

Red Wiggler Worms
Packaging: Your worms have been harvested, weighed and then packaged with dry peat moss in a breathable bag to keep the worms safe while traveling to their new home. Using dry peat moss may seem odd but it protects the worms from freezing in the winter and overheating in the summer. Please introduce the worms into their new home as soon as possible as they will be dehydrated after the long trip.
Introducing your worms into your garden, lawn or compost pile:
¤ Garden: Loosen the top 18" of soil in the middle of your garden and place all of the worms in a 1-foot diameter area. Sprinkle 1 cup water over the worms and cover with loose soil, wet newspaper, compost, or peat moss. Composting worms live in the top 18" of loose soil and thrive best in colonies. DO NOT spread them out!
¤ Compost Piles: IMPORTANT - Only introduce worms into a compost pile that has finished its active thermal cycle. Loosen or turn the top 12" of the compost pile adding the worms into one area. Sprinkle 1 cup water over the worms and cover with compost, wet newspaper, peat moss or loose soil. Worm composting will cut your compost piles finishing time by 2/3rd's.
Introducing your worms into a worm bin or kitchen composter: To bed your worms in a new worm bin/composter, we recommend opening the worm bag, spreading the worms and peat moss over the top of your worm bin/composter. Sprinkle 1 cup water gently over worms and put the lid on the worm bin/composter. The peat moss is a good bedding material and is safe to leave with the worms as additional bedding. Please be sure to have some food available in the worm bin/composter for the worms as they will be hungry after the long trip. The composting worms will explore their new surroundings and may even try to escape which is normal in the first 24-hours. To avoid this from happening, we recommend placing a light directly over the worm bin/composter as a deterrent. If the first 24-hours has passed and the worms are escaping, they are telling you that there is a problem with the bin/bed/composter.
Tips on care of your new composting worms:
¤ Temperatures: Composting worms can survive at temperatures between 38° and 90°, but they thrive at temperatures between 65° and 80°.
¤ Sunlight: Composting worms do not like direct sunlight and will die if they are left in the sun too long. Please be sure to keep your worm bin/composter in an area out of direct sun or direct sunlight so that it will not overheat.
¤ Moisture: Composting worms like moisture but do not like to be overly wet. Worms breathe air through their skin and if you put too much water in your worm bin/composter they cannot breathe well. We recommend that you keep the bedding between 6-7 on a moisture meter (for plants). Plant moisture meters can be purchased at most garden centers for less than $20. If you do not have a moisture meter, the bedding should be moist but not dripping wet when squeezed (like a wrung out sponge).
¤ Worm Bins/Composters: Please be sure that your worm bin/composter has good ventilation; it should be opaque (ie. not see through). It should have a way for excess water to drain from the bottom and a lid to keep the inside dark (worms like the dark). The worm bin/composter should be located in an area out of direct sun or direct sunlight. If the bin/composter doesn't meet standards, feel free to view the ones we offer: Worm Factory Basic, Worm Factory 360 and Garden Worm Composting Tube

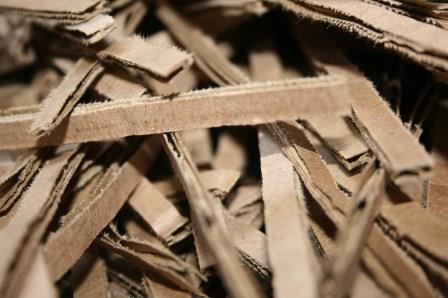
¤ Bedding: Very important because that's where the worms live and breed. There are many different combinations of materials that can be used for bedding such as: dried leaves, cardboard, peat moss, newspaper, coconut coir, grass, hay, straw, etc. Plant Natural's site is a great composting site for ideas and information. The most common bedding formula is equal parts of shredded newspaper and coconut coir or peat moss. It is best to fluff up (loosen) the bedding about once a week when you feed. In nature, composting worms live in the loose compost layers of the ground and do not thrive in compacted soils. There are some important things to remember when making bedding. The bedding needs to have a balanced pH, correct moisture and reasonable C:N ratios (20:1 - 30:1). In other words, it's similar to composting without worms, just don't enter the active  thermal stage. Interested in the science side of the topic? Compost Fundamentals is a manual explaining the many interdependent factors fundamental in planning composting projects or analyzing composting operations; geared towards the science based relationships. More specifically, the Carbon-Nitrogen Relationship.
¤ Food: Composting worms are healthy eaters and need to be fed regularly. There are many different foods that composting worms love; here are just a few tips on the dos and don'ts for feeding your worms.
¤ Dos: Green table scraps, vegetables (especially squashes), potato peels, coffee grounds, tea bags, green yard/garden waste, fruits (especially melons), composted leaf or grass clippings, and manures: horse, goat, pig, rabbit, cow (Check to make sure the animals haven't been de-wormed if possible). Worm Chow is available as well.
¤ Don'ts: Avoid fats, meat, bones, dairy products, fish, dog/cat poop, limit the amount of fruits that are citrus and vegetables that are acidic, avoid onion and garlic, poisonous plants, treated wood products and wood chips.
¤ Preparation tip: The smaller you chop the green waster the faster it breaks down for the worms to eat. Remember to move the food to different areas of the bin/bed/composter each time you feed. Don't over feed or it will make the bin/bed/composter smell, attracting flies and other pests. If you have questions, please see our Frequently Asked Questions (FAQs).

